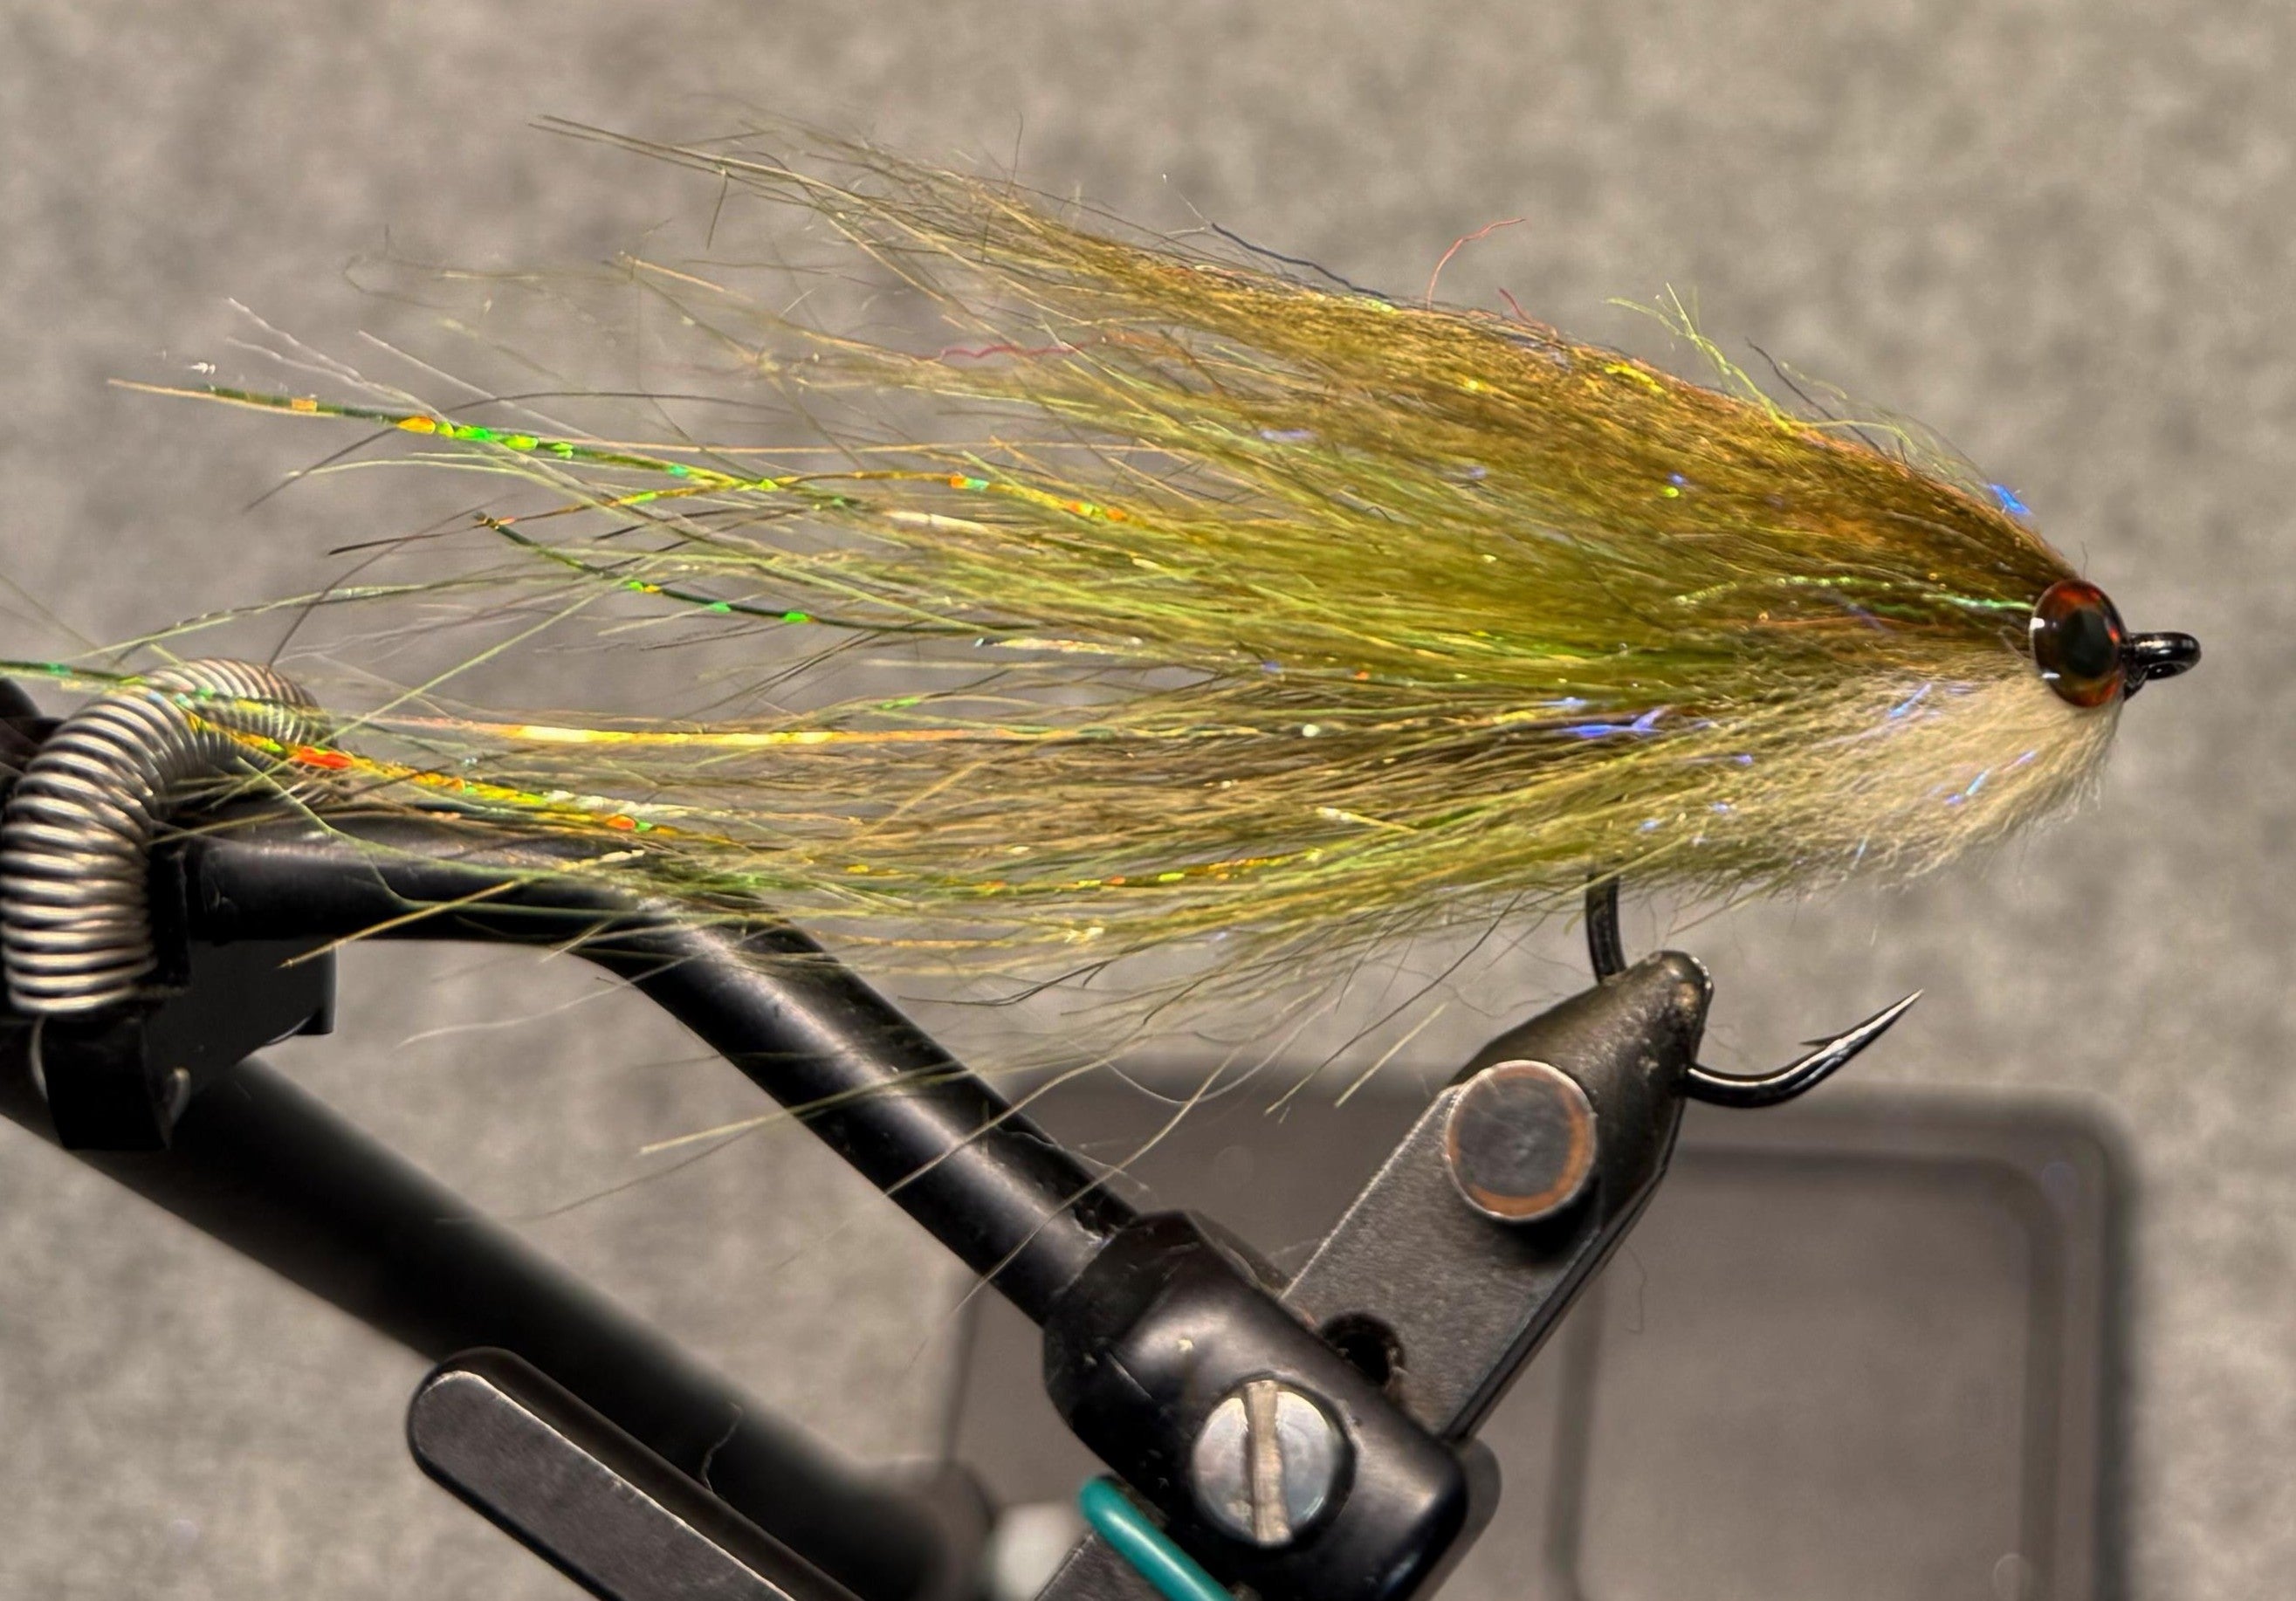
There can be little argument that when you’re chasing big fish with bad attitudes, not much beats tying on a baitfish imitation and waiting for that absolutely electric eat. Sure, there can be times when the toothy tyrants seem to be as fussy as well-educated trout on a chalk stream, but by and large predatory species evolved to eat meat so making the choice to throw something juicy should get you bit. When tying those juicy imitations for predatory fish there are just as many tying elements that need to be considered as when tying a tactical nymph or delicate “match the hatch” type dry. Without overthinking these elements we’re going to share a predator fly platform that’ll help you get comfortable with a handful of the fundamental elements key to tying “the big stuff”. If you’re an experienced hand behind the vise, it’s a fly platform that may get you re-thinking a few things before putting your own spin on the pattern.
Key tying elements that we’ll focus on are as follows:
- The fly needs to be simple to tie. Big flies shouldn’t always take hours to tie, given they often get destroyed after a serious eat being able to whip up a handful in an afternoon is a plus.
- The fly needs to cast and present well. Your fly should be tied sparsely, but with materials that still provide the illusion of bulk under water. As far as possible materials should shed water, and where the materials don’t they should be used strategically and sparingly.
- The fly needs to hunt, and not just on the retrieve, but even more so on the pause! Profile, pushing water, predatory triggers etc. are all great tying elements to incorporate and the longer your fly hovers in the zone the more time these elements have to come into play. Think about how many eats – even trout or yellowfish eats – you’ve had on the pause… It’s a thing so tie to maximise it.
Don’t be shy to reach out to our inhouse tyers for more on the theory, it’s a rabbit hole that is many coffees or beers deep, but for now let’s get into the hands-on side of the basic tying elements.
Start with a good hook. The closer an part of your rig is to the fish, the more important that element is. We’ve spent many years in the field chasing big nasty fish and are constantly searching for that next innovation. In the last year or so we’ve been piloting a new range of hooks that’s impressed us immensely. From tigerfish to tarpon, the Sakuma heavy streamer hooks with their unique tri-cut point have proven to be the business! We’re using a #1/0 on this particular fly, a quick dab of super glue on the shank followed by evenly spaced thread wraps and you’ll have formed a solid base for your fly. We’re partial to nanosilk or veevus gsp for our predator flies, and to your hook base you’re going to add a pinch of your favorite bucktail. The bucktail helps balance the fly during the pause, as well as provide support for the material we’ll be adding in follow up steps. We’re loving the new range of MidWest Bucktail we have available, a first in South Africa. It’s incredibly high-quality stuff, being hand selected and hand dyed, you’ll find the fibers are soft and have just the right amount of crinkle and movement to them. In short, it’s the bucktail many of the pro’s on the ‘gram have been using undercover and its now finally available in South Africa…

Once you’ve got your hook and bucktail support base whipped up, next we’ll be tying in the first of a series of triggers – flash worked into and around the tail of the fly, be sure to take your time to get an even spread of flash. We’ve got some great pre-packed blends, but we’re partial to blending three or four styles and colors of flash to come up with something bespoke. We feel blending flash seem lives and breathes better than using a single flash material, and can be a key element to triggering that big eat on the pause! Top tip: We hollow tie our flash, as well as taper the length of the flash strands for that something extra.

With the lifelike tail of your fly taken care of, we’ll be looking to advance our thread forward and start layering in the body of our predator fly. You can stack more bucktail for this on larger predator flies, but on the size #1-2/0 sized flies we use polar chenille or streamer string, bonus trigger points if it’s got some UV strands in it. Using the chenille adds just enough support to the upcoming layers of body material without adding unnecessary bulk and weight, it’s also a material that sheds water.

Before we start to layer in our chosen body material, we’ll trim the bottom of the filler chenille in an effort to free up the hook gape of material but more importantly help keel the fly without having to add additional weighting wraps to the curve of the shank. With the filler chenille trimmed is time to add your body material layer of choice – we’re using Squimpish fiber, another secret of the ‘gram pro’s (watch this space for local availability…), but you could use more bucktail, sculpting fiber or even fishient’s flekta fusion if you’re looking for a bit more pop. On the larger flies we’d think about hollow-tying this layer in, but in this #1/0 example, we’re laying our Squimpish down flush.

With the transition from tail to body now taken care of, you’re going to look to add some shoulder structure to the body to prevent that “wet sock” vibe that plagues so many poorly tied predator flies. Hollow tied MidWest Bucktail does the trick! Less is definitely more for this shoulder step, try your best to get a split of 60-70% bucktail on top of the hook and 30-40% below the hook to again help with the natural keeling of the fly. We’ve chosen to use the same shade of olive as we used for the tail support given the different shades of flash and Squimpish we’ve used up to this point, but feel free to mix it up and use a different tone for this step. We’ll often go all in and use a hot orange or sunburst yellow bucktail in this step as a trigger. This step, and the structure tying element, really helps create the illusion of bulk under water. It also helps slow the descent of the fly in the water column on the pause, giving you more time in your target predator’s face.

For our #1/0 sized example we’re ready to move onto the head of the fly, on a larger hook you’d repeat the previous body and shoulder steps as required. For the head of our fly we’re looking for something that creates a smooth transition, blending in the different layers we’ve tied in so far, while at the same time holding just enough structure to push water. For us that’s Nightmare Musky Flies titan dub (again, watch this space for local availability…), that’s Fulling Mill XYZ, or that’s Brusier blend. Try your best to align and stack the fibers before hollow tying your dubbing of choice in. For added trigger effect we like to go with a darker dorsal color and lighter ventral color, imitating the “two tone” affect present in nearly all baitfish. If you’ve got your material spacing a little off, don’t worry about it, repeat this step with a pinch of material to get your thread positioned just behind the eye. We double whip finish our predator flies, and given we use nanosilk or veevus gsp tying thread, we also add super glue to our thread before doing so which results in about as solid a finish on a fly as you’re going to get. The super glue is essentially in the whip finish, not on it…


We’re entering the homestretch. Give your fly a good brush to get rid of any loose strands of material and really blend the different layers together. There are some great products on the market, but an old-fashioned pet brush works for us. Trim the underside of your dubbing head a little at a time. You’re looking to remove material, again helping open up the hook gape and keel the fly naturally, while at the same time shaping the underside of the fly. We’ll trim a little from the left, a little from the right, rotate the vise, trim a little, eye ball the fly in hand, trim a little etc. Another quick brush to get rid of any last fibers and your ready for the most controversial step. Eyes.

There are times we won’t add eyes to our flies as there’s just no getting away from the fact that eyes do affect the weighting and swimming action. That said, there’s also no getting away from the fact that eyes are a serious trigger point. To this end you’ll see some of our predator patterns being tied blind, some with marker drawn eyes, some with tape eyes, some with epoxy eyes, some with plastic dumbbells and some with weighted dumbbells – each style of eyes has their pro’s and cons. In this example fly we’ve gone with epoxy eyes, held in place with e6000 glue. It’s more difficult to work with than super glue but we feel it gives a far stronger hold once cured. You’ll still potentially lose an eye when your fly gets t-boned by some absolutely heinous fish, but you shouldn’t lose an eye if your fly interacts briefly with a tree stump or outboard motor cowling… If we’re going with eyes, we’ll often use a little UV resin to smooth out the leading edge of the eye where it touches the head material, as well as a small resin “bridge” between the eyes, both on top of and underneath the hook eye for strength. With resin, less is definitely more.
Final tip, once your glue and resin have properly cured – a day if using E6000 – rinse the fly under hot running water. By letting the hot water run from the hook eye down to the tail, and then letting the fly hang somewhere to dry, you’ll really help set the profile of the fly.
Happy tying! If anything in the example is a little fuzzy, you’re looking for advice or you’ve got some of your own ties or catches you’d like to share please get in touch – we’d love to hear from you.
SBS by David Allen

